Configure a Remote Rendering Image service
As per https://grafana.com/docs/grafana/next/image-rendering/, Grafana supports the usage of the image rendering plugin for automatic rendering of panels as PNG images.
However, this plugin cannot be installed in the current Grafana instance, and needs to be exposed from outside the instance. (ffi: https://grafana.com/blog/2020/05/07/grafana-7.0-preview-new-image-renderer-plugin-to-replace-phantomjs/)
In that sense, we propose users to deploy its own Remote Rendering Image service that can be consumed from the Grafana instance.
Deploy the Remote Rendering Image
Info
You need first to create a project under PaaS in case this does not exist, as per https://paas.docs.cern.ch/1._Getting_Started/1-create-paas-project/
Assuming you have created a new project (or re-used an existing one), it's time to proceed deploying it.
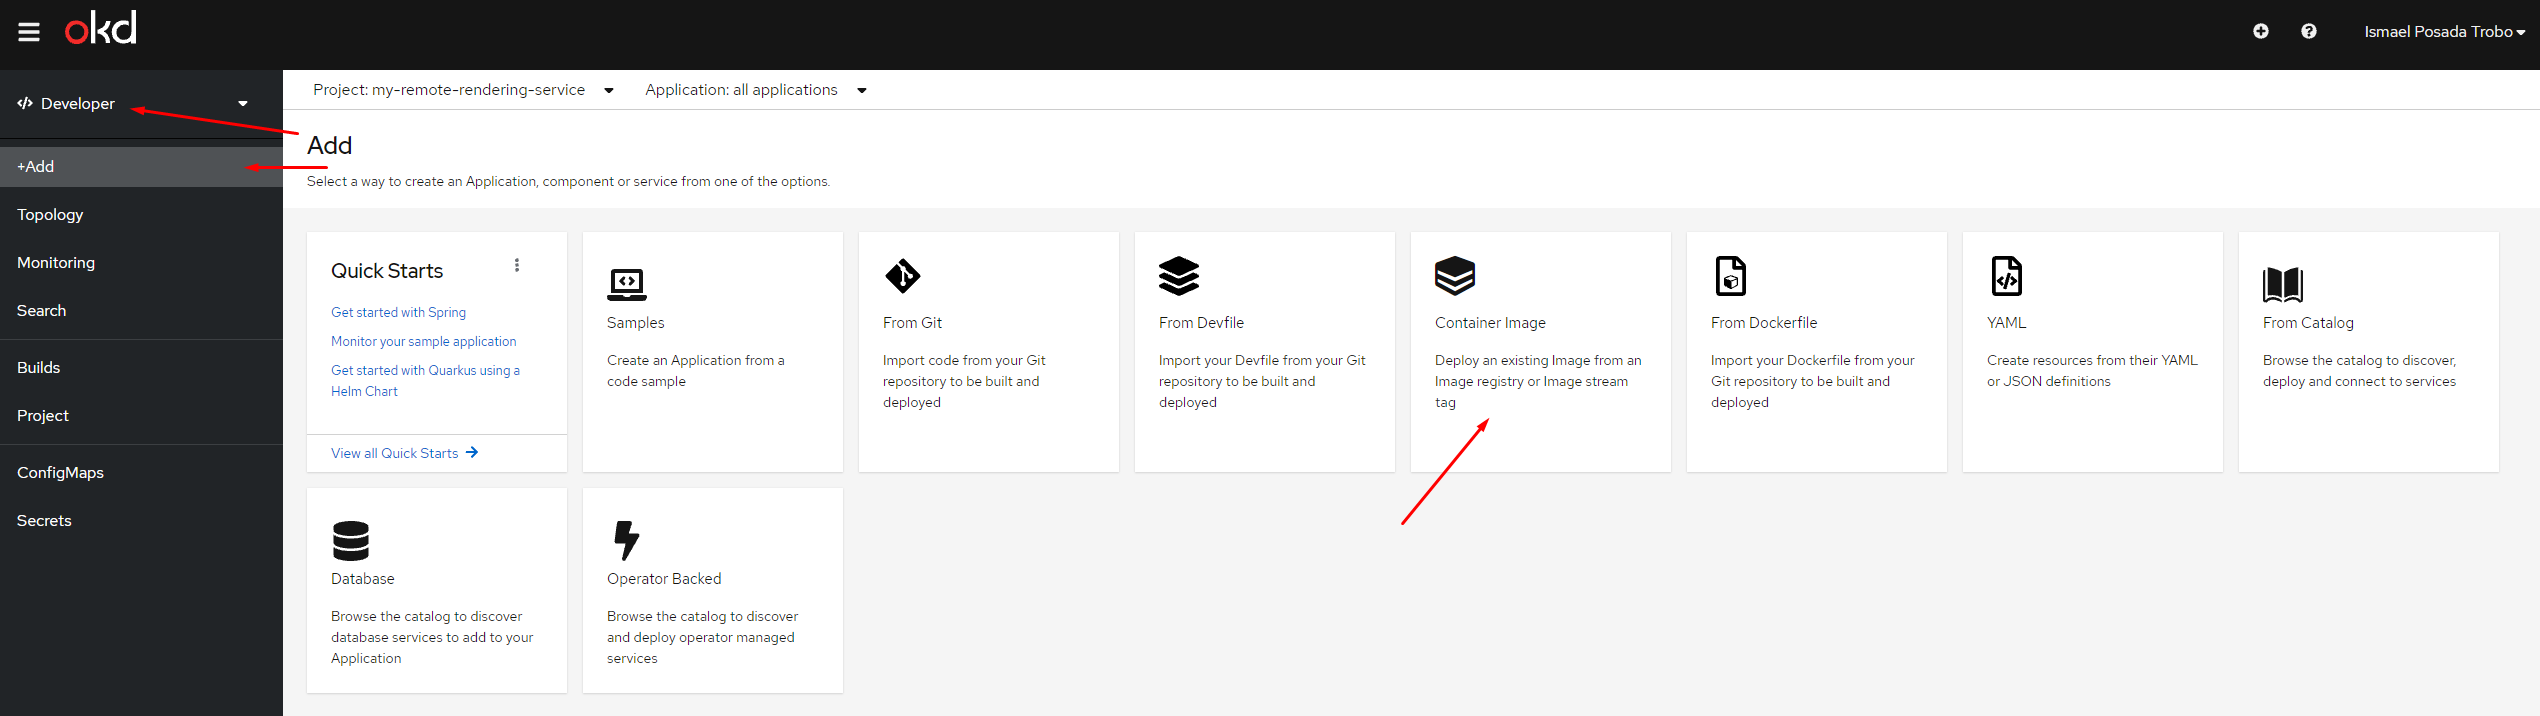
Switch to the Development environment and click on the +Add button. Then, click on Container Image:
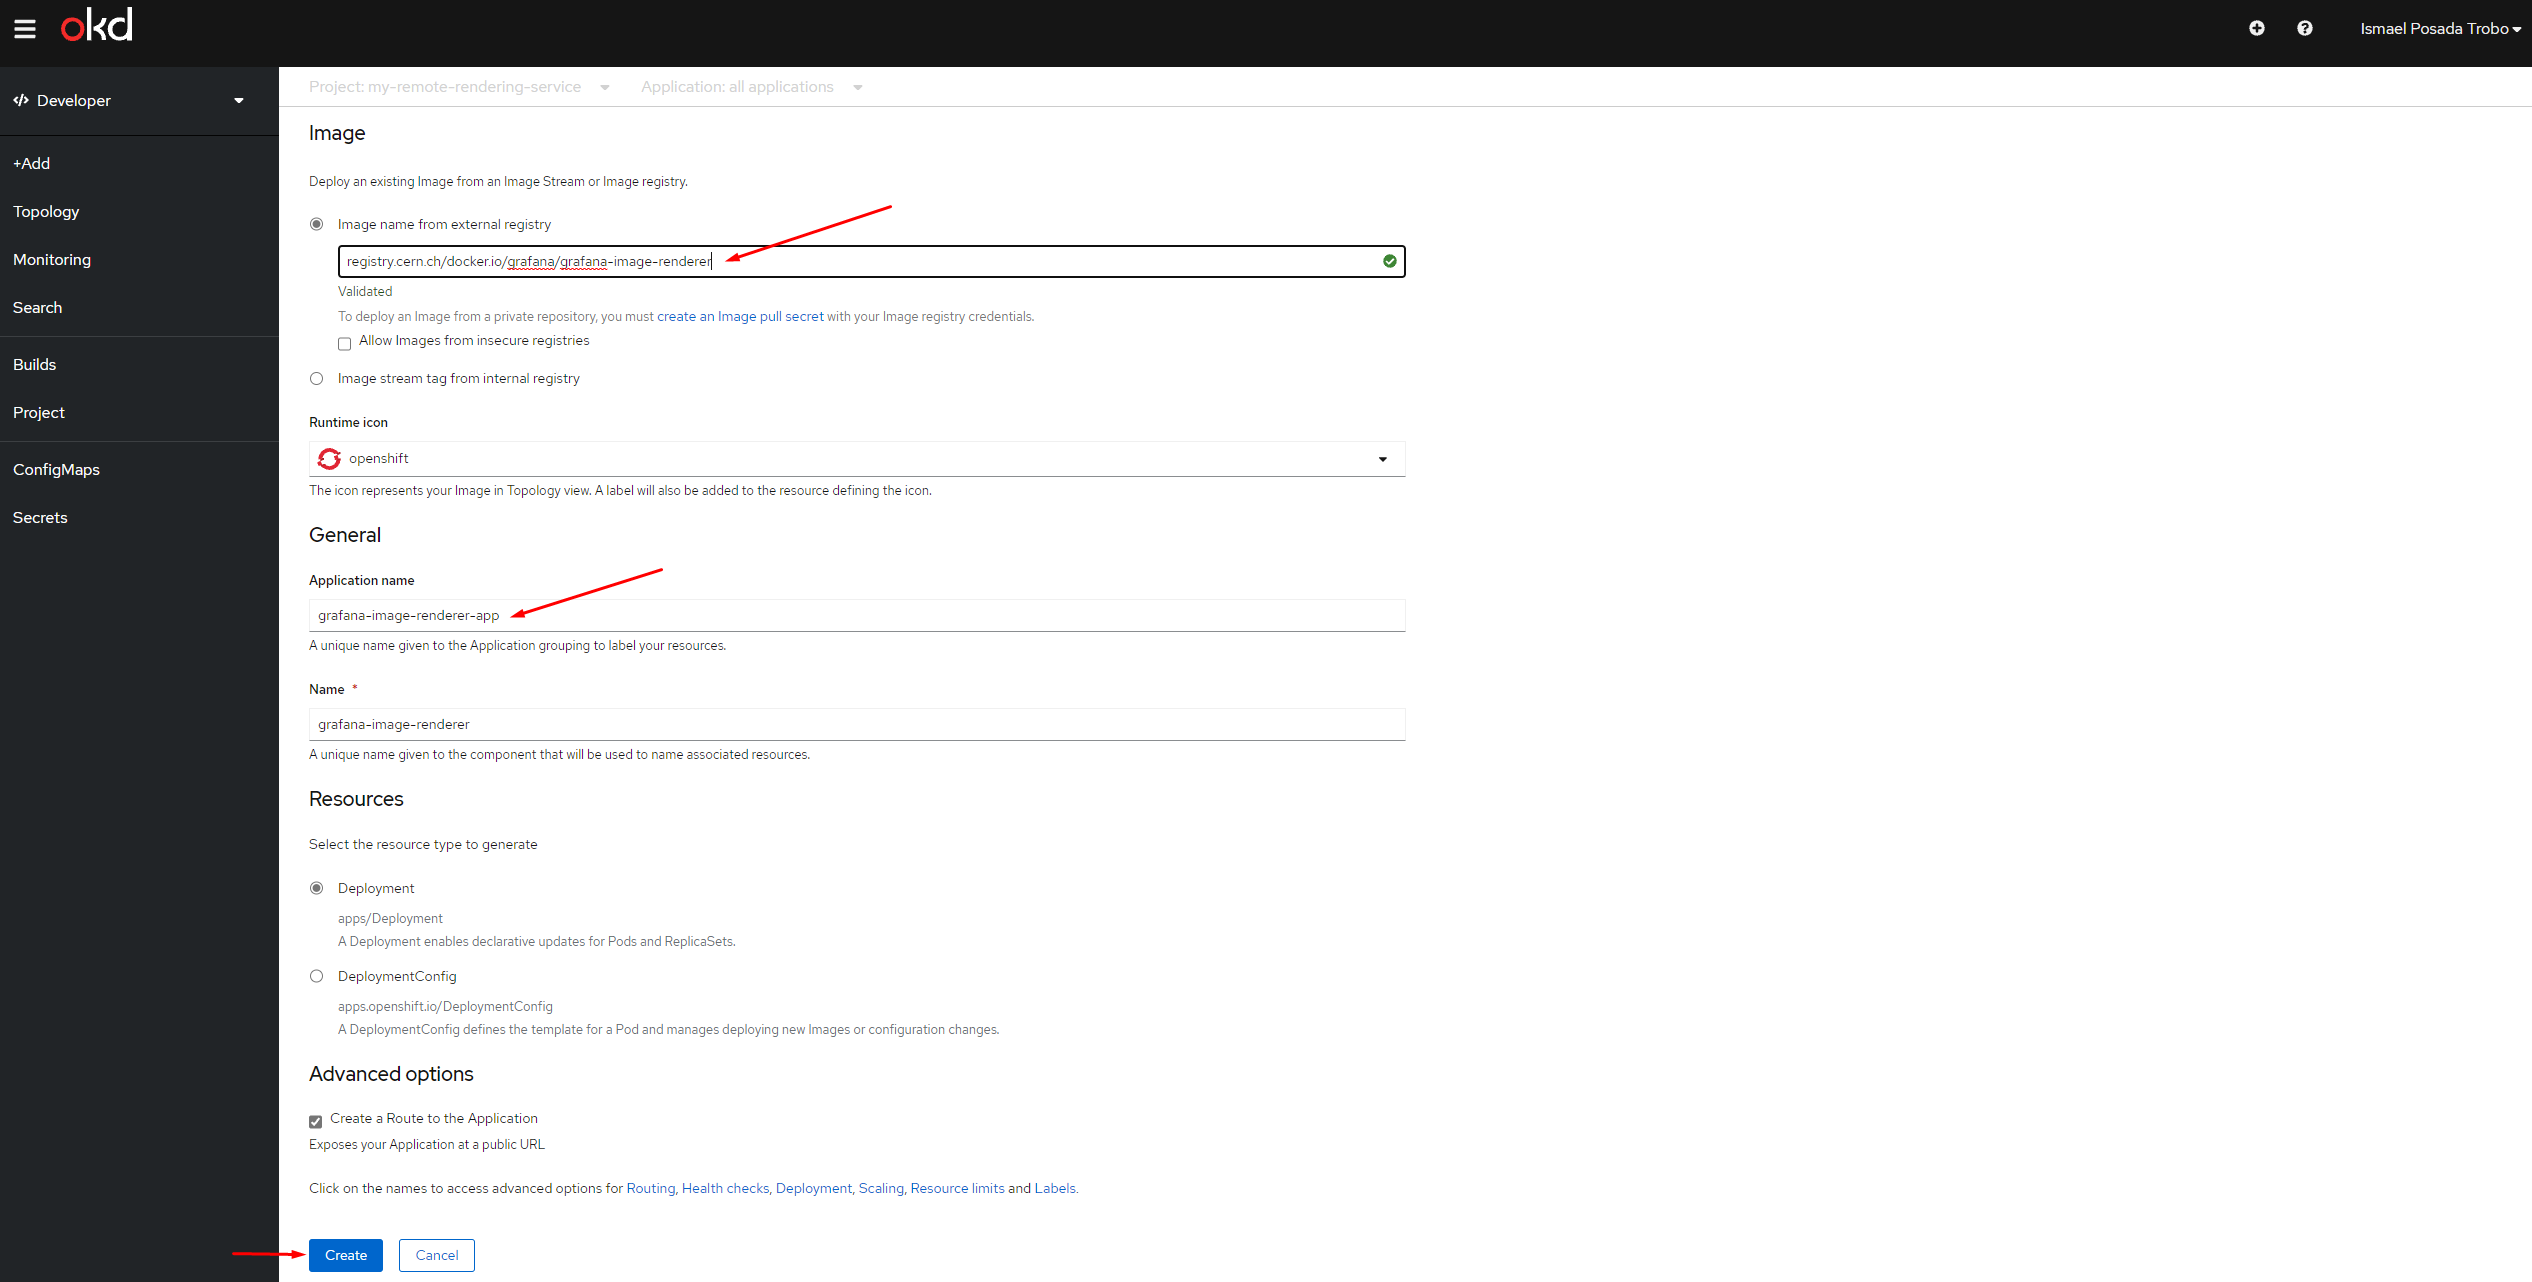
We will deploy our render image from an existing image in Docker hub.
Under the Image name from external registry field, set the following (we will use the DockerHub Cache offered by our colleagues in IT-CM. FFI: https://clouddocs.web.cern.ch/containers/tutorials/registry.html#dockerhub-cache):
registry.cern.ch/docker.io/grafana/grafana-image-renderer
Then, you can optionally provide a meaninful name under the Application name and Name fields if needed.
And finally, click on Create and it's done. After some seconds, your Remote Rendering Service is ready.
To access your new Remote Rendering service, check the route under Networking. It's worth navigating to https://<sitename>.app.cern.ch/render/version to see which version of the remote rendering image we are using.
Info
Note that at any point, you can change the default route provided when deploying the Remote Rendering Service. Under Administrator environment, go to Networking > Routes. Click on the existing route and then the YAML tab. Change the spec.host value accordingly to your needs (e.g, https://my-awesome-rendering-service.web.cern.ch/).
For resources management of this service in terms of memory and cpu, please go to https://paas.docs.cern.ch/6._Quota_and_resources/2-application-resources/
Configure your Grafana instance to consume the Remote Rendering Image service
Now, it's time to let our Grafana instance about this new endpoint.
We go to https://app-catalogue.cern.ch, and after selecting our Grafana project, we proceed editing the initial configuration. We need to include the rendering element under the spec.config element, hence will land automagically into the grafana.ini configuration as follows:
spec:
  config:
  ...
    rendering:
      server_url: https://my-remote-rendering-service.app.cern.ch/render
...
And it's done. Grafana will start using this remote rendering service in order to automatic rendering panels.